The Core Memory Module from my dad’s homebuilt PDP-11/05

Here is one:

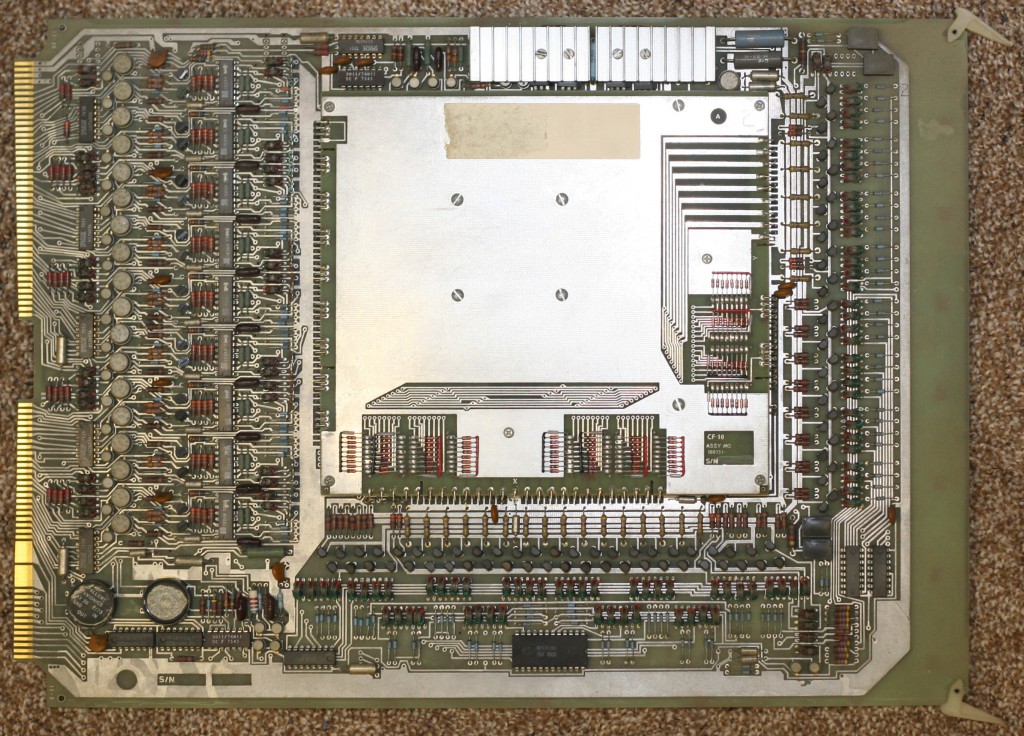
Core Memory ModuleThis is basically the 1974 version of a DIMM. It measures 16″ by 11.5″ and holds 16 kilobytes. It’s technically 18 bits wide but only 16 were used in the PDP-11. The raised part in the middle is where the cores are actually stored. Each bit is a little ring with 3 wires running through the middle. By running current through the wires you could magnetize or demagnetize each ring. One interesting tidbit is that reading is destructive! When you read a bit you are actually demagnetizing the ring and the memory controller had to then do a write cycle to restore the bit. You can’t see the rings in the picture (I’m guessing they kept them covered because they were fragile), but you can see some nice pictures and a more in-depth explanation at the Wikipedia page.

The cool thing about the module is that everything is discrete. There’s not a custom chip in sight. Along the bottom and right edges of the board you can see the row and column drivers. On the right you can see 18 instances of the sense amplifiers and inhibit drivers (1 for each bit in the word).

Here’s some pictures of the computer it came out of:
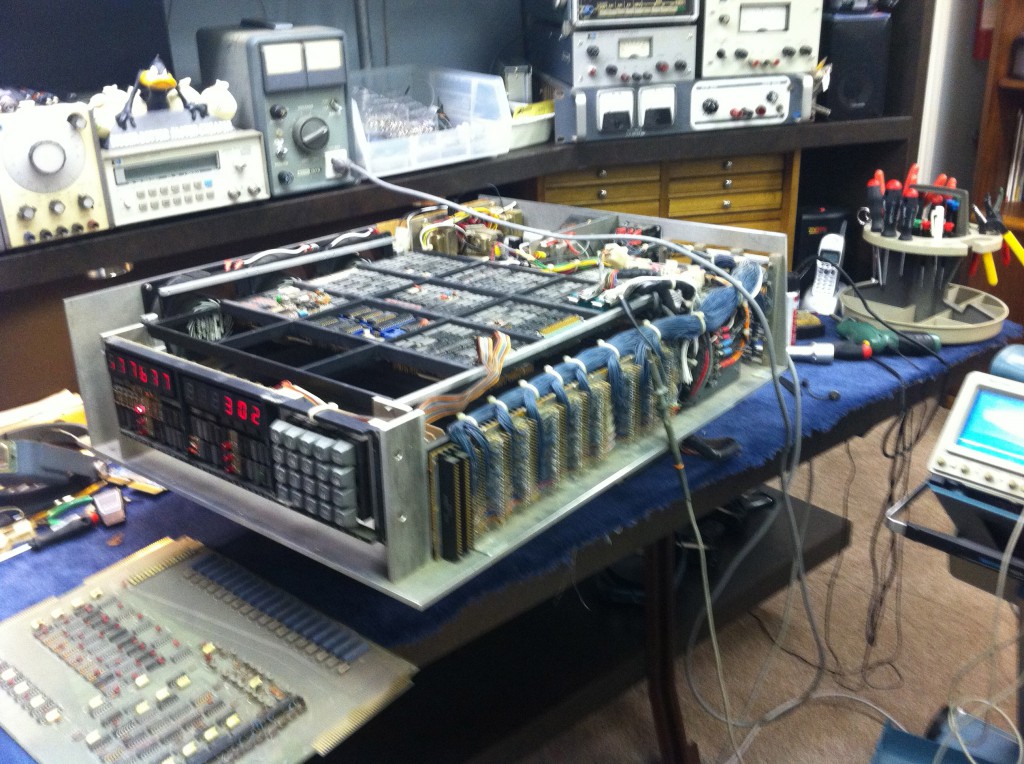
PDP-11/05That is a PDP-11/05 that my dad built from scratch. That top part is the main computer (the processor is not a microprocessor, instead it’s made from discrete parts). It was all wire-wrapped by hand. Here’s the back:
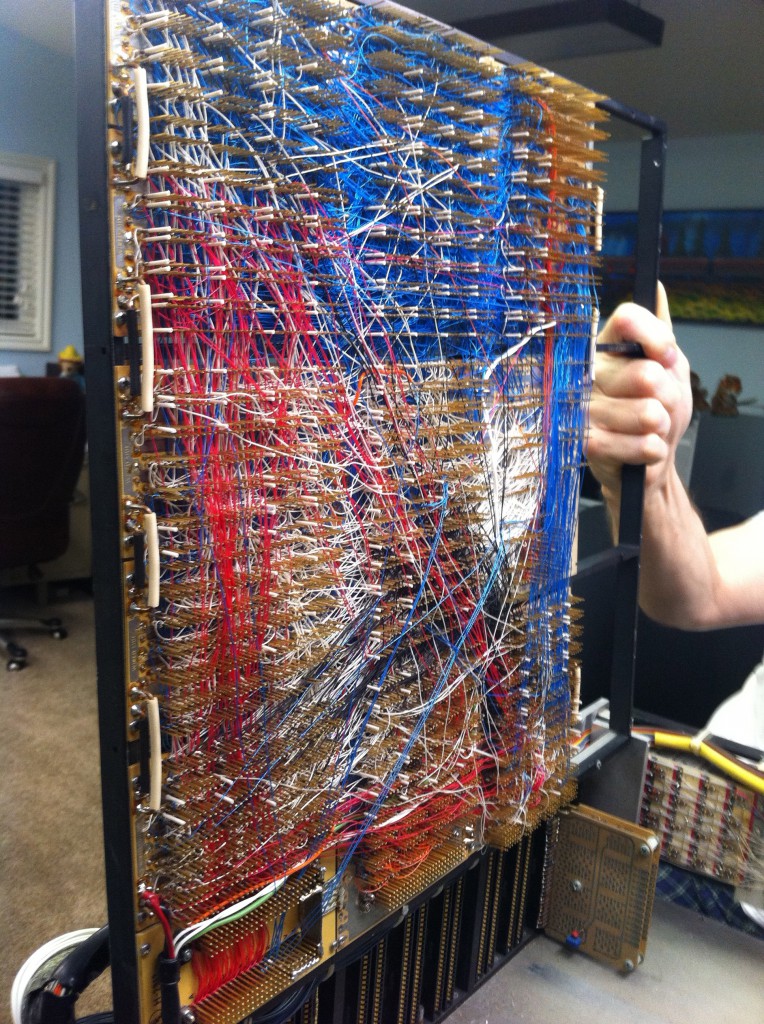
PDP-11/05 WirewrappingI can’t even imagine having the patience to do that! All the colors of wire mean different things, too (they’re grouped by logical parts of the computer–data paths, control paths, clocks, etc). The slots below the board are for expansions cards–electrically they are Unibus but their physical form factor is custom to his computer. Here’s the hard disk controller card:
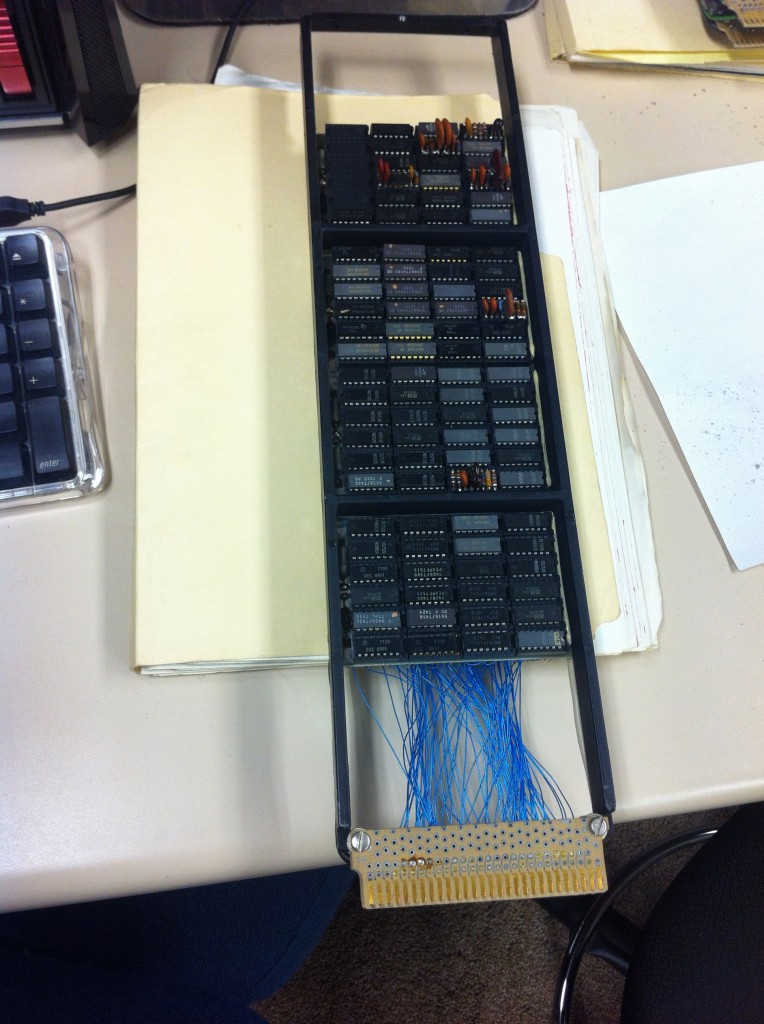
Hard DIsk Controller CardThis disk controller could support 2 10MB hard disks. The computer also has a floppy controller (for 8″ floppy drives) and a RS/232 controller card (3 ports).

It’s funny that I grew up with this computer (and later a PDP-11/34 with 2 rack of equipment) but never cared about what kind of thought and work must have gone into it… I was always way more interested in my pirate Apple ][+ clone that I put together from a kit in second grade (if you’ve never used an Apple ][ before, try this emulator I recently wrote in HTML5). But now my dad decided to get the PDP back up and running so he’s been showing me all the little parts and I think I’m old enough now to appreciate it.

The interesting thing for me about all this old technology was how amazingly straight forward 90% of it is. For instance, the front panel has a keyboard that shifts 3 bits at a time into a shift register and then lets you generate bus cycles (all driven by state machines in hardware). This was instead of the DEC’s computers which makes you enter binary with 16 individual switches–it’s a nice, simple addition that makes it way more pleasant to work with than the standard PDP-11 and it’s totally understandable.

Emacs For OS X . com gets a new Mac Mini

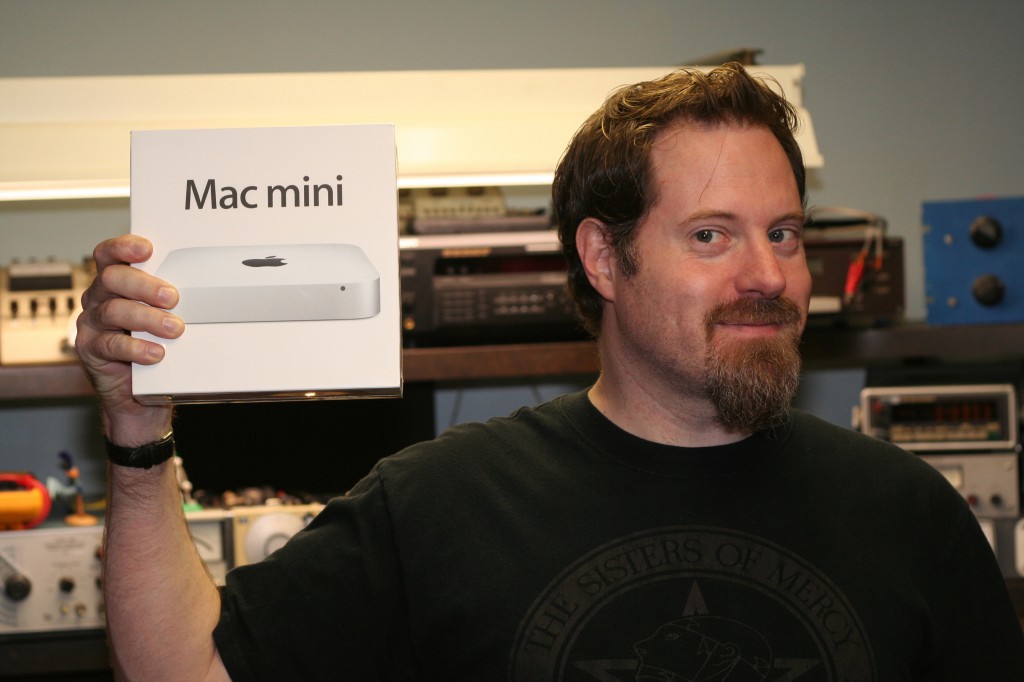
I recently used Funded By Me to help raise some money for a new build server for Emacs for Mac OS X . com. I set it up and then decided to start publicizing it on a Friday and by the end of the following Monday all the money had been raised! I was blown away by people’s generosity—I hadn’t people to donate so much so quickly. In fact, I even got Lena, my awesome contact at Funded By Me, to lower the minimum donation amount to $5 because I didn’t expect anyone to actually donate more than that! I had set the campaign to run for 30 days—further evidence of my underestimation of the Free Software users out there. It made me worry that I’d have to sit around for the better part of a month before being able to get at the money but it turns out Funded By Me let me take an early payment since I had hit my required minimum. So on Friday I took a trip to the Apple store and bought a Mac Mini. Here’s a picture of me posing dorkily with it:

Me and the new Mac Mini

I thought about taking a picture in front of the Apple Store itself but got embarrassed at the cheesiness of it and chickened out.

The next part was tricky: I had to get Snow Leopard installed on it. It turns out that they revved the Mac Mini back in July, just after Lion was released. Luckily I found out from this article that Snow Leopard runs just fine, but can be a little tricky to install. Luckily I had all the right pieces. Here’s a look at the setup involved:

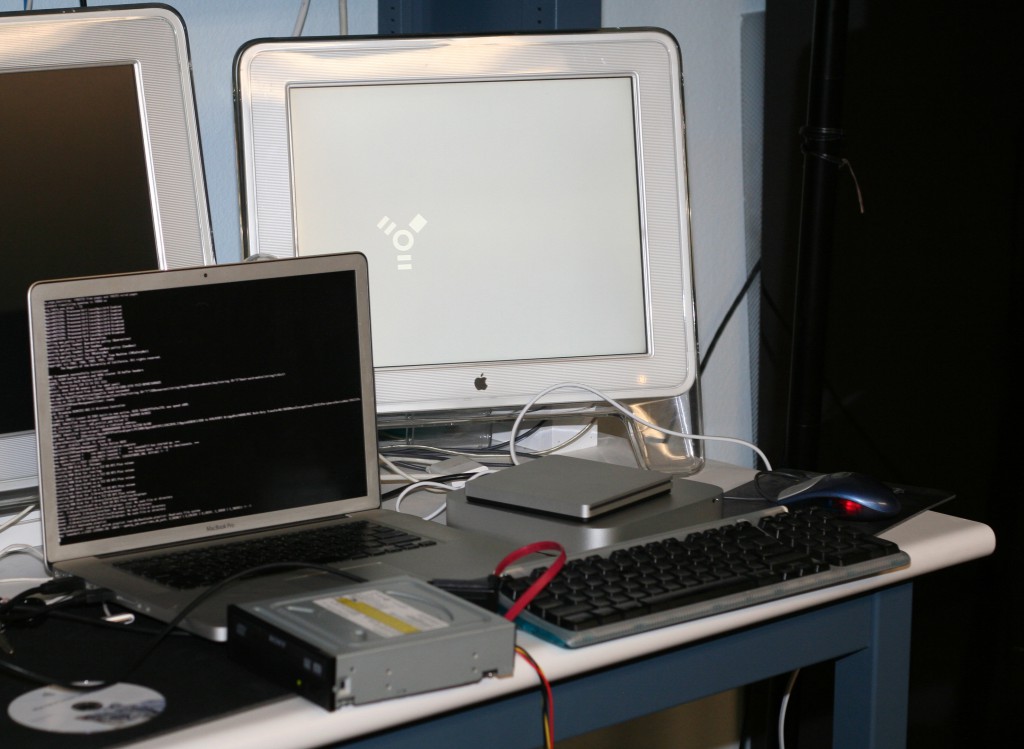
The Convoluted Install

The Mac Mini is in FireWire target mode (boot up holding the “t” key down”). It’s connected to the FireWire port of my MacBook (seen here booting off the CD—yeah, I “nvram boot-args=-v” because I’m hard core!). I replaced the optical drive in my MacBook with an SSD so I had to hook up an external drive to boot off of. The external Apple drive I borrowed wouldn’t work with my MacBook (my brother claims it needs some sort of special non-standard high voltage USB ports) so I had to use the big clunky one with a SATA to USB converter.

Crazily enough, all that worked! I used my MacBook’s install CDs to put Snow Leopard on the Mac Mini and then booted the MacBook up so that I could do a software update. After the software update was done, the Mac Mini booted up just fine under Snow Leopard and I was up and running.

The new build server is up and running!

On the builds page there are now 2 builds from the new machine. The 2011-11-05 nightly was build by hand as I tested the build script and got the list of >= $30 donors installed on the disk image (and also set up the donor web page I promised). The 2011-11-06 was the first build that was built unattended from cron. From here on out it should be smooth sailing.

Thanks to everyone!

I’m very pleased that all the future builds will be on this machine that the community paid for. Again I’ll say thanks—I was blown away by the generosity of complete strangers. It makes me want to donate more of my own money and time to things I believe in.

Hardware friendly C structures

What I really want is a language that has really good structures. That is, they can represent hardware/fixed layouts effectively.

Say I were to enhance C (instead of designing a whole new language). I want something like this:

struct FATBoot {
    uint8_t BS_jmpBoot[3];
    char BS_OEMName[8];
    little uint16_t BPB_BytsPerSec;
    uint8_t BPB_SecPerClus;
    little uint16_t BPB_RsvdSecCnt;
    uint8_t BPB_NumFATs;
    little uint16_t BPB_RootEntCnt;
    little uint16_t BPB_TotSec16;
    uint8_t BPB_Media;
    little uint16_t BPB_FATSz16;
    little uint16_t BPB_SecPerTrk;
    little uint16_t BPB_NumHeads;
    little uint32_t BPB_HiddSec;
    little uint32_t BPB_TotSec32;
    union {
        struct { // FAT12 and FAT16 only:
            uint8_t BS_DrvNum;
            uint8_t BS_Reserved1;
            uint8_t BS_BootSig;
            little uint32_t BS_VolID;
            char BS_VolLab[11];
            char BS_FilSysType[8];
        };
        struct { // FAT32 only:
            little uint32_t BPB_FATSz32;
            little uint16_t BPB_ExtFlags;
            little uint16_t BPB_FSVer;
            little uint32_t BPB_RootClus;
            little uint16_t BPB_FSInfo;
            little uint16_t BPB_BkBootSec;
            uint8_t BPB_Reserved[12];
            uint8_t BS32_DrvNum;
            uint8_t BS32_Reserved1;
            uint8_t BS32_BootSig;
            little uint32_t BS32_VolID;
            char BS32_VolLab[11];
            char BS32_FilSysType[8];
        };
    };
    align(510)
        little uint16_t BS_FATMagic;
};

I picked this structure because I was unable to represent it in my fat C code because of the crazy alignment. The only thing new yet is the “little” and “align” keywords to specify endian, and alignment/offset respectively. You would probably end up using typedefs like “luint16_t” instead of “little uint16_t”. “big”, of course, would also exist. If neither is specified, then you don’t care and therefore should be implementation defined.

Then what I want is this:

{
    tight FATBoot diskBoot;
    loose FATBoot memBoot;
    pread(fd, &diskBoot, sizeof(diskBoot), 0);
    memBoot = diskBoot;
}

memboot is the structure using the alignment and endianness of the host processor (the “loose” keyword). diskBoot is the structure packed as specified and using the endian specified. The endian would be enforced so that the memory image of diskBoot would always be correct. Accessing diskBoot.BPB_TotSec32 would evaluate to the EXACT same thing as memBoot.BPB_TotSec32 but memBoot would be quicker since it doesn’t have to reverse (potentially) or read the bytes out and reconstruct the uint16 in some odd way (because of the weird alignment of the structure). This puts a lot of extra burden on structure copies when one is loose and one is tight, so you would expect them to be slow–certainly not memcpy() speeds.

You could also use “strict” and “relaxed” but “loose” and “tight” are both 5 letters. 🙂

Basically, I want the compiler to deal with stupid endianness for me. I also want my structure to not be compiler dependant. I should be able to publish the structure in my spec and it should work on all compilers and architectures. Bit fields, for instance would be specified a certain way and not be “implementation defined”. At lease the tight ones would. Loose means “implementation defined, and fast”. Tight means “standards defined, but possibly slower”.

Last Modified on: Dec 31, 2014 18:59pm